Docker Basics
Table of contents
- Ensure Docker is working
- Containers and images
- PID 1
- Interactive Container
- PID 1 Explored Further
- Final Notes
Ensure Docker is working
Check to see which versions of docker and docker-compose you have installed by running
docker -v and
docker-compose -v, respectively.
I’m currently on:
| Docker version 18.09.0, build 4d60db4 |
| docker-compose version 1.23.1, build b02f1306 |
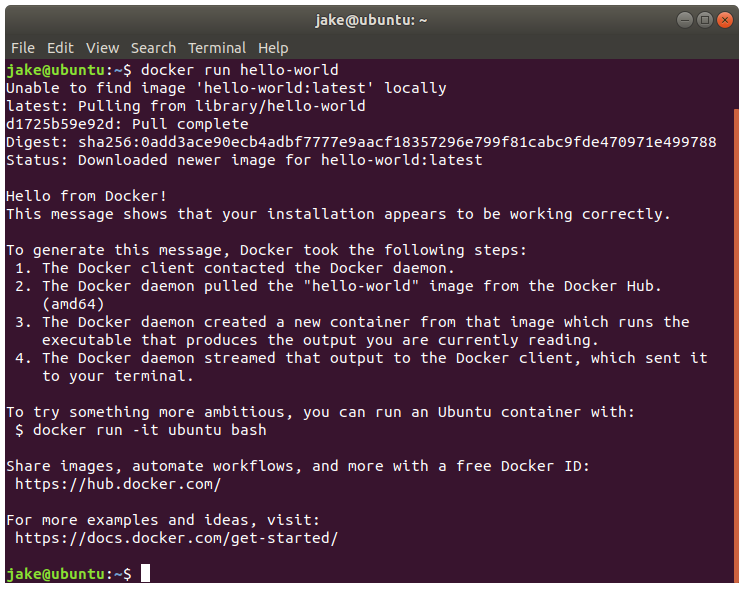
Let’s run the following command to check that Docker is working:
docker run hello-world
This will take the following steps:
- Check if the image ‘hello-world’ exists
- If not, fetch the image from docker hub (https://hub.docker.com/)
- Create a new container from the image
- Run the container
You should see something similiar to the following:
Containers and images
Images are an inert, immutable file that is essentially a snapshot of a container.
Containers are a lightweight and portable encapsulations of an environment in which to run applications which could simply be thought of as ‘an instance of an image’.
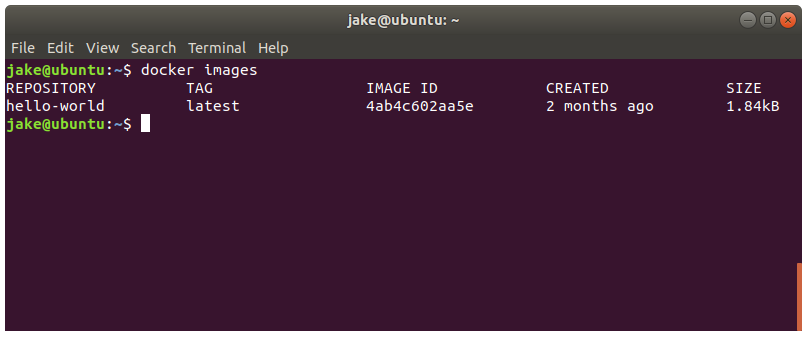
We can see the images that currently exist with either docker image ls or docker images.
Given we previous ran “hello-world”, we should see one image in our list:
We can see the active containers by running either docker container ls or docker ps.
However, we do not currently have any active containers. If we append -a to our last command, it will show all containers.

Now we can see that we have one container with the exited status.
PID 1
When a container starts, it has a process assigned to PID 1. When PID 1 ends, the container will exit.
If you look at the previous screenshot, you will notice the “hello-world” container has the command “/hello” specified.
This means that when the container starts up, it will run the program “/hello” which will print a message and then end.
Given there is no longer a process running on PID 1, the container will exit.
Interactive Container
It is possible to interact with containers. To further explore the concept of PID 1, we need to understand this first.
Rather than doing this with the run command, we shall manually pull, create, and start.
- Download the “busybox” image:
docker pull busyboxWe can verify the image has downloaded with:
docker images.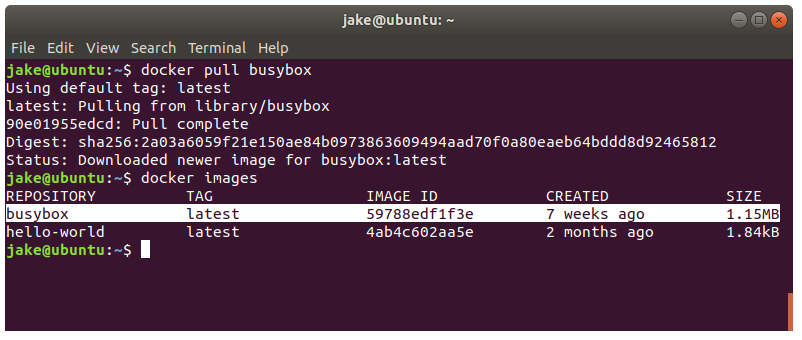
- Create a new container:
docker create busyboxUpon creation it will display the container ID - this cannot be changed.
Let’s look at our containers with
docker ps -a. Remember - we haven’t started the container just yet, only created it (hence the-a). We can see it has the status “Created”.To interact with the container we use either the ID on the name. Given we haven’t specified a name, a unique one has been generated. In my case, it is “boring_roentgen”.

- Start the container:
docker start <ID|name>In place of
<ID|name>, I could specify either “a65a4d556ba1” or “boring_roentgen”.But… nothing happened. Check our containers again with
docker ps -a. You’ll notice the status of the busybox container has changed to “exited”.This is a similiar situation we experienced with “hello-world”. “busybox” will run “sh” when started. However, given the standard input (STDIN) has not been kept open, the shell exited and thus so did our container.
- Let’s create an interactive busybox container:
docker create --name busybox_interactive -it busybox-i: interactive, which keeps STDIN open
-t: allocate a pseudo-TTY, so we can interact with the terminal These are typically used together.
--name: as you may have guessed, set the name of the container.To confirm, run
docker ps -a. You should see a new busybox container with the name “busybox_interactive”. - Start the container:
docker start -i busybox_interactiveOur terminal is now displaying the contents from inside the container.
To return our terminal to the host, we can either:
• Use the shortcutCtrl+P,Ctrl+Q: this will keep the container running;
•logout,exit: this will end the process and thus the container will exit.If the container is still running, we can reattach to the sh on PID 1 with:
docker attach <ID|name>.
Challenge
Rather than using
pull,create, andstartlike we’ve done above, it’s easier and more common to simply userun.Using
run, launch an interactive container named “busybox_interactive” from the “busybox” image.Given names must be unique, and we already have a container with the same name, is it not necessary to run this command. Simply note what you’d think it’d be.
Solution
docker run -it --name busybox_interactive busyboxNote the similarly with the
createcommand.
PID 1 Explored Further
- Start a new busybox container:
docker run -it busyboxThis will be terminal-1.
-
View the processes inside the container with
ps. We should see the following output: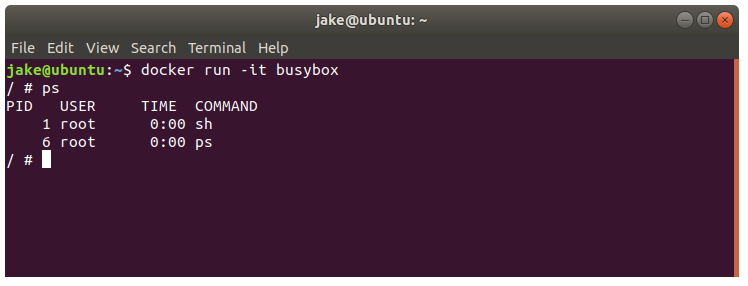 Note that PID 1 has the
 shcommand assigned to it. -
Open a new terminal window (terminal-2) and get the ID or name of the container with
docker ps.
In my case, the name ishungry_newton. - Start a new
shprocess inside the container:docker exec -it hungry_newton shWe now have two
shprocesses running inside the same container. -
In either terminal, type
psto view the running processes. We should see the following output: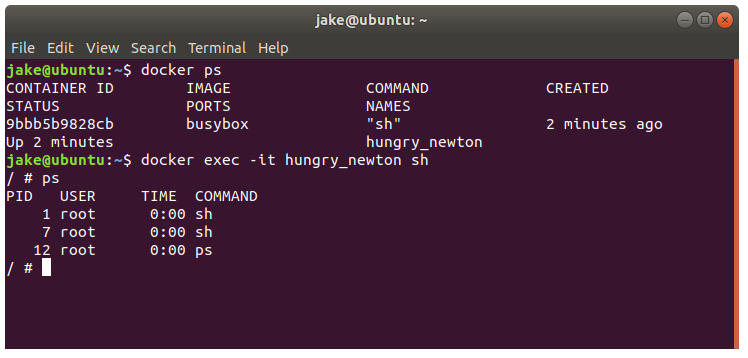
- In terminal-1, end PID 1 by typing
exit.
Take note that terminal-2 has also exited.
This confirmed that when PID 1 ends, the container will exit.
We’ve also learned how to use exec to start a new process in the container.
A container typically won’t have a shell running on PID 1, so if we want to explore inside the container, using attach won’t be of much use.
Therefore, a common approach is to use docker exec -it <ID|name> sh to start a new shell process that we can navigate with.
Final Notes
We want containers to be disposable. If a container is stopped, killed, removed, etc., we should be able to simply spin up another one and our program should resume.
This means you should not be storing any state inside of the container. To store state, we mount a volume to the host and therefore store it on the host filesystem.
Keep this concept in mind going forward.